Introduction
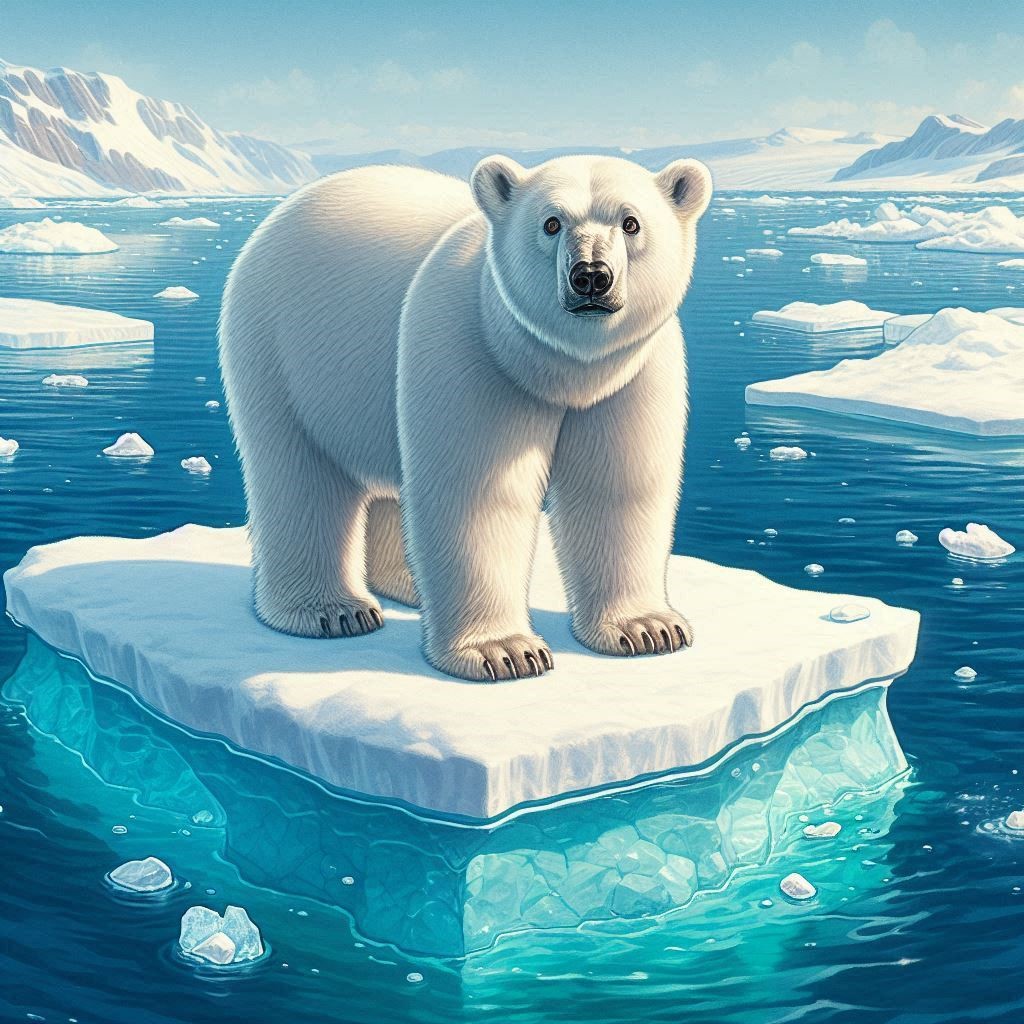
Drawing a polar bear can be a delightful adventure into the world of wildlife art. These magnificent creatures, with their fluffy white fur and powerful presence, inspire many artists. Whether you’re an experienced illustrator or just starting out, capturing the essence of a polar bear on paper is both challenging and rewarding.
Imagine bringing to life an Arctic scene where these majestic animals roam freely amid icy landscapes. With the right techniques and materials, anyone can create stunning representations of these iconic bears. Get ready to unleash your creativity as we embark on this step-by-step journey toward mastering polar bear drawing!
Materials Needed for the Tutorial
To embark on your polar bear drawing journey, gather a few essential materials. Start with high-quality sketch paper. This provides the perfect texture for both pencil and shading.
Next, select your drawing pencils. A range from H to B will give you versatility in line quality and shading depth. An eraser is equally important; opt for a kneaded one that allows for precise corrections without damaging the paper.
Consider using colored pencils or markers if you wish to add vibrant hues later on. A blending stump can help create smooth transitions between shades, enhancing the realism of your artwork.
Don’t forget about reference images! Having photos or illustrations of polar bears handy will guide you through proportions and details as you draw. With these materials gathered, you’re ready to bring your polar bear art to life!
Step by Step Guide on Drawing a Polar Bear
Begin your polar bear drawing by sketching a large oval for the body. This will serve as the foundation of your artwork.
Next, add a smaller circle at one end for the head. Position it slightly overlapping with the body to create a natural connection.
Now, draw two additional ovals for the legs. Make them short and stout, reflecting their powerful build.
For ears, add two small half-circles on top of the head. These features will give your bear character.
Once you have these basic shapes in place, connect them with smooth lines to form a more defined outline. Pay attention to proportions; polar bears have robust bodies and relatively small heads.
Remember to keep your pencil light so you can easily erase any mistakes later on while fleshing out details!
Adding Details and Texture
Once you’ve established the basic form of your polar bear, it’s time to add depth and dimension. Start by layering in details that capture the essence of this majestic creature.
Focus on the face first. Notice how the eyes are set deep within a rounded skull. Use gentle strokes to create soft shadows around them, enhancing their expressive nature.
Next, turn your attention to the fur texture. Polar bears have thick, fluffy coats that reflect light beautifully. Employ short, quick strokes for a more realistic appearance; varying your pressure will mimic fur’s natural flow.
Don’t forget about the paws! Add definition with subtle shading between toes and emphasize their size compared to other elements in your drawing.
Consider incorporating some environmental details like ice or snowflakes to ground your bear in its habitat and enhance realism further.
Tips and Tricks for Realistic Polar Bear Art
To elevate your polar bear drawing, focus on capturing the essence of their fur. Use short, quick strokes with your pencil or brush to mimic the texture. Layering these strokes will add depth and dimension.
Consider the light source in your artwork. Shadows play a crucial role in creating realism. Observe how light interacts with a polar bear’s body and replicate that contrast in your shading.
Don’t shy away from color experimentation! While they appear white, polar bears have subtle hues—creamy yellows or soft blues can bring life to your piece.
Study real-life references for anatomical accuracy. Understanding their posture and movement will enhance authenticity.
Practice patience. Realistic art takes time; don’t rush through details like eyes or paws—they are essential for bringing character to your drawing.
Other Techniques to Try
Experimenting with different techniques can elevate your polar bear drawing to new heights. One popular method is using the grid technique. This involves creating a grid over your reference image and another on your drawing paper. It helps you accurately scale and position each element.
Consider incorporating mixed media for added depth. Watercolors or colored pencils can complement graphite sketches beautifully, providing vibrant accents that enhance fur texture.
Digital art offers endless possibilities too. Programs like Procreate or Photoshop allow you to play with layers, giving you control over shading and detail without smudging traditional materials.
For those who love challenges, try capturing movement by sketching a polar bear in action—perhaps diving into icy waters or lumbering across snowfields.
Always feel free to explore unconventional styles as well! Abstract interpretations of polar bears can reveal unique perspectives while honing your artistic skills further.
Conclusion: 10 Easy Tips for Creating a Stunning Polar Bear Drawing
Creating a stunning polar bear drawing is an exciting journey that combines basic shapes, attention to detail, and artistic flair. Here are ten easy tips to elevate your artwork:
1. **Start with Basic Shapes**: Use circles and ovals as the foundation for the head and body.
2. **Use Reference Images**: Look at photos of real polar bears for accurate proportions and features.
3. **Sketch Lightly**: Begin with light pencil strokes so you can easily erase mistakes.
4. **Focus on Proportions**: Pay close attention to the size relationships between different body parts.
5. **Layer Your Colors**: If using colored pencils or paints, build up layers for depth in your fur texture.
6. **Add Shadows Wisely**: Incorporate shadows under the belly, paws, and around facial features for realism.
7. **Experiment with Textures**: Try different techniques like cross-hatching or stippling to represent fur accurately.
8. **Keep Practicing**: Don’t be discouraged by initial results; practice makes perfect!
9. **Seek Feedback**: Share your work with friends or online communities for constructive critiques.
10. **Enjoy the Process**: Remember that art is about expression—enjoy each step of creating!
With these tips in mind, you’re ready to tackle your next polar bear drawing project confidently!